ADMIN PANEL - for NAITS Administrators
| 1. Introduction | |||||||||||||||||||||||||||||||||||||||||
| The administration console of the NAITS can be accessed only by the NAITS user who is belonging to the
ADMIN group. After signing into the system, in the bottom right corner, there is a button which leads to the administration console. | |||||||||||||||||||||||||||||||||||||||||
| After the user opens the ADMIN CONSOLE, the following screen appears: | |||||||||||||||||||||||||||||||||||||||||
| 2. User groups management | User groups are firstly listed in the left side menu. This option represents the groups, which are
dedicated to organize and unify usage of the NAITS system for multiple users. | ||||||||||||||||||||||||||||||||||||||||
| 2.1 Preview of existing user groups
First there is a list of pre-defined user groups for the NAITS system. They are:
| |||||||||||||||||||||||||||||||||||||||||
| 2.2 Create a new user group
Each admin user can add a new user group, if needed, via the ADD option placed at the top-right corner at the grid. | |||||||||||||||||||||||||||||||||||||||||
| 2.3 Filtering existing user groups
The administrator user also is able to filter along the list of user groups via the option FILTER which is placed at the top-right corner at the grid, next to the ADD option. | |||||||||||||||||||||||||||||||||||||||||
|
|
2.4 Manage user group permissions
The pre-defined user groups already have pre-installed the appropriate package of permissions via the Apply permission tool, place at the center above the grid. After selected a user group on which you want to assign/unassign permission, you should select the permission package via the dropdown placed centrally above the grid, and then click APPLY permission. Then the system is giving both option for assign/unassign permission package.
have enough knowledge for the database structure represented in the ER diagram for NAITS.
Each user, besides his own inherits the use group permissions. | ||||||||||||||||||||||||||||||||||||||||
| 3. Users management | |||||||||||||||||||||||||||||||||||||||||
| Users are next in the list placed at the left side menu. This option represents all users installed in the
system, and their details. | |||||||||||||||||||||||||||||||||||||||||
| 3.1 User details
When the admin user, wants to see the user details, he needs to click on some of the users listed in the grid. After this is done, the new user details screen is shown: At the left side menu, the following options exist:
Above the grid, there exist more features applicable for the user. | |||||||||||||||||||||||||||||||||||||||||
| 3.2 Manage with user permission packages
permission packages via the package selector and assign/unassign of the appropriate package. | |||||||||||||||||||||||||||||||||||||||||
| 3.3 Permission packages description
There are different permission packages, each one appropriate per some of the sub-modules in the NAITS.
| |||||||||||||||||||||||||||||||||||||||||
| 3.4 Manage with user <-> user group relation | |||||||||||||||||||||||||||||||||||||||||
| 3.5 Attach a user to user group
Each user, during the first installation is being assigned to his user group. But if there is a need to add the user in another group or groups, this is how the admin user can do it. First select a user, then choose a user group from the dropdown with user groups, and then click Add users to selected group. | |||||||||||||||||||||||||||||||||||||||||
| 3.6 Detach a user from user group
Each user can be removed/detached from a user group. The admin user first should select the user, choose the appropriate group, and then click Remove users from selected group. | |||||||||||||||||||||||||||||||||||||||||
|
3.7 What happens when a user is attached/detached to some user group
After the user has been attached to some user group, he directly inherits its permission. When he will be detached from the same user group, he will not be able to inherits/posses the user group permissions any more. The administrative console management system also is taking care for potential overlaps, since it’s not limited the object access only per one group. So, if there is a permission per same object with same access level in two different groups, the user will inherits it as one; but if there is a permission per same object but with different access level, then the use will inherits both of them, but the one with higher access level will be superior. For example if we have an user which is linked to FVIRO and CVIRO user groups. Here we must now that these use groups have the following permission:
to:
to a object LAB_TEST_RESULT will be inherited from FVIRO - LAB_TEST_RESULT.READ
affect nothing because the remover permission LAB_TEST_RESULT.READ is with lower access level than the LAB_TEST_RESULT.FULL | ||||||||||||||||||||||||||||||||||||||||
| 3.8 Assign a user to a organizational unit
Each user can be allowed or not to work with some organizational unit and its items. This is used for:
| |||||||||||||||||||||||||||||||||||||||||
| 3.9 Reset user password
In case of need, the system is allowing to reset the user password to the default one via the RESET PASSWORD option. | |||||||||||||||||||||||||||||||||||||||||
| (3.10) Manage the user status
In order to manage the user status, you first need to select the user on which you want to change the status, and then according the need you can:
| |||||||||||||||||||||||||||||||||||||||||
| (3.11) Assign a user to a laboratory
Linking the user to laboratory is from essential meaning for the LABORANT group, in order to link which user from the LABORANT group on which data should have access. | |||||||||||||||||||||||||||||||||||||||||
| 4. Labels | |||||||||||||||||||||||||||||||||||||||||
| In the Labels section you can search for any label by entering the label code or label text in the search
part placed above the grid. At least one should be entered in order to search the labels. Also you can choose the locale. | |||||||||||||||||||||||||||||||||||||||||
| 5. Organizational units | |||||||||||||||||||||||||||||||||||||||||
| Here are listed all registered organizational units. The user is able to filter the organizational unit by
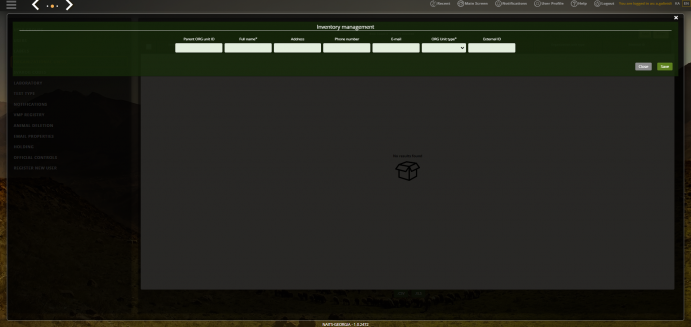
clicking the filter button from the top-right corner at the grid. This section also allows adding new units which can be achieved by clicking the add button. | |||||||||||||||||||||||||||||||||||||||||
| After clicking the add button this screen is displayed. Here you need to enter the data for the unit you
want to create and in order to finish this action you need to click the save button in the bottom-right corner. In the end you will see the newly added organizational unit in the grid. | |||||||||||||||||||||||||||||||||||||||||
| 6. Svarog codes | |||||||||||||||||||||||||||||||||||||||||
| The Svarog codes section is used for storing the svarog codes where you can see all codes. If you select
one of the codes you can see its details and children, also their data can be edited or deleted. | |||||||||||||||||||||||||||||||||||||||||
| 7. Laboratory management | |||||||||||||||||||||||||||||||||||||||||
| From this screen the admin user, can register new laboratories or edit their info data. This is allowed in
order when there is a change with some existing laboratory, or when there is a need for creating/removing some. Also this directly affects the list for creating or removing a relation between the user and the laboratory. | |||||||||||||||||||||||||||||||||||||||||
| 8. Test type | |||||||||||||||||||||||||||||||||||||||||
| Under Test type you can see all registered laboratory tests and if you select one of them you’ll be able to
see test’s details. From this section by clicking the add button you’ll be able to add new laboratory tests. | |||||||||||||||||||||||||||||||||||||||||
| 9. Notifications | |||||||||||||||||||||||||||||||||||||||||
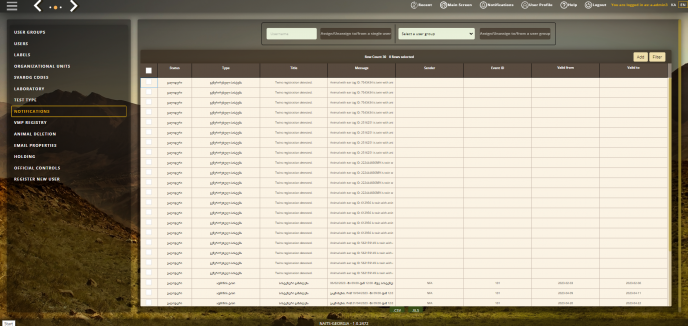
| In this section you will see all the system generated notifications which can be filtered, but also you can
create new ones by clicking the add button in the top-right corner of the grid. | |||||||||||||||||||||||||||||||||||||||||
| After saving the notification, you can see it in the notifications list. | |||||||||||||||||||||||||||||||||||||||||
| If you select a notification you can assign/unassign to/from a single user or user group from the section
above the grid. | |||||||||||||||||||||||||||||||||||||||||
| 10. VMP Registry | |||||||||||||||||||||||||||||||||||||||||
| This is an option where the user can see all registered drugs. | |||||||||||||||||||||||||||||||||||||||||
| If you click the add button from the top-right corner of the grid you can create new drugs. | |||||||||||||||||||||||||||||||||||||||||
| 11. Animal deletion | |||||||||||||||||||||||||||||||||||||||||
| This is a section for deleting animals by entering the id and the type of the animal. | |||||||||||||||||||||||||||||||||||||||||
| 12. Email properties | |||||||||||||||||||||||||||||||||||||||||
| When you enter the email properties section you can send a test email by entering the data for the
sender and the recipient. | |||||||||||||||||||||||||||||||||||||||||
| 13. Holding | |||||||||||||||||||||||||||||||||||||||||
| From this section you are automatically redirected to the holding section. | |||||||||||||||||||||||||||||||||||||||||
| 14. Official controls | |||||||||||||||||||||||||||||||||||||||||
| This is an option where the official controls are registered. | |||||||||||||||||||||||||||||||||||||||||
| 15. Register new user | |||||||||||||||||||||||||||||||||||||||||
| This is an option, when there is need to be created a new user via the admin console. This user initially,
does not have any relevant permission rights, so after initial creating he need to be assigned on some user group, according the needs. |


